Thursday, July 31, 2014

African Batiks Quilt


 AFRICAN BATIKS QUILT
51.5" x 55.5"
Designed and made by Jamie
2008

This is a quilt I made to commemorate my trip to Ghana, Africa. I was fortunate enough to travel to Ghana in 2005 with my BYU Nursing class for an international health class. We stayed a glorious 5 weeks and it was the experience of a lifetime. Although most of the time I was there I was involved in nursing-related activities, I was able to do some fun tourist things. I was simply captivated by the craftsmanship of fabrics there! I saw how batiks are made by the locals in Ghana. The artists apply wax to portions of the fabric where they don't want a particular color to adhere, then dip the fabric into dye. The fabric then goes through a super-hot wash to melt the wax and those portions then only show the raw fabric color or whatever color was underneath. This process can be repeated several times with different colors to create a layered, vibrant work of art.

I scanned in some photos from my trip since I didn't own a digital camera back then!
These are some of the ladies dipping the batik prints into dye buckets. 

Here is an artist applying a layer of wax to a work in progress. Look at the finished pieces behind him. I absolutely loved the style of the images, the vibrant colors, and the fact that it was all handmade. As an artist myself, I enjoy seeing evidence that technology isn't totally replacing the art of creating beauty by hand.

Not only did they do batiks by hand, the people at this fabric market in Ghana also did woven fabrics by hand. Here is a loom I got to try out! Every vertical strand was tied on to the frame of the loom and the horizontal strands were made by passing a wooden spool containing thread back and forth (by hand!) between the layers of vertical strands.

You can see underneath the fabric that there are foot pedals, similar to an organ. The foot pedals would move different combinations of the vertical strands to the upper or lower position during weaving to create the beautiful pattern. I can't remember exactly how it all worked anymore, since this was 9 years ago, but it was quite impressive! I do remember after a few passes of the wooden spool, the weaver would take the wooden crossbar and pull it forward sharply to beat the threads in tight to each other. (I'm sure I'm botching all the technical language for the actual parts of a loom.) Watching them work, the wooden spool would fly back and forth, their feet would be working the pedals, and their arm would grab the crossbar and pound it into the fabric: zip, zip, BANG! Zip, zip, BANG!

A lot of Ghanaian women wore handmade clothing, either they made themselves or had made by a seamstress or tailor. Their outfits for church were stunning! I met a few seamstresses and loved to learn about their equipment and admire the gorgeous prints they had everywhere. My friends and I were able to go to a huge fabric market while we were there. If I had known then what I would be doing now with quilting, I would have bought SO much more fabric! It was very inexpensive too, compared with retail fabrics in America. I don't know the quality of the manufacturing process of all of their greige goods in Ghana, but the prints and colors were unbeatable. In fact, if I had known more back then, I would have asked more questions about types of fabrics I was purchasing, and the recommended care for them. That is one of my only regrets about my trip there.

 Interesting little tidbit: I wasn't even considering a career in midwifery at this point, but I was able to attend a birth in a country hospital, owned and operated by Dr. Emmanuel Kissi. It was a magical thing, which stayed with me the rest of my schooling and was partly the reason I chose to become a midwife myself. The laboring woman walked a dirt road a few miles from her house to check herself into the birthing room, which was probably about 15x20 feet. She snapped her fingers and breathed whenever the contractions came, otherwise I would not have even known she was having a baby. The Ghanaian women I saw in labor were very stoic, and accordingly very majestic. Even the newborn baby was wrapped in beautiful fabric just after being born.

Here is a little sampling of some of the prints I brought home from Ghana with me. I had some batiks (not pictured below) made of a heavier fabric that coordinated beautifully for a quilt. If any of you readers have tips about washing/care of unknown fabrics, I'd be happy to hear them! A few of these prints have a waxy sheen pattern overlay them that adds another dimension to the fabric (kind of like quilting does for a quilt) and I've been too scared to wash them or iron them for fear they will be ruined. I did actually rinse some artistic batik prints I had bought (just in cold tap water) and the colors bled significantly. When they dried, they were about 50% the opacity they had originally been. It was sad.

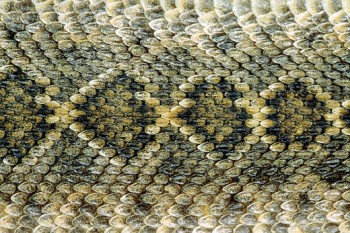
So anyway, with this batik quilt I wanted to venture away from patchwork squares, since that was all I had ever done up to this point. I decided to do half-square-triangles, or HSTs as I've now learned they're called. I cut a ton of right triangles out of each of my three coordinating fabrics and came up with a pretty cool diamondback pattern. It reminds me of the diamondback snake, actually. I still hadn't tried to look up how to bind a quilt, so I did my own haphazard version by folding a store bought bias tape strip at the corner and hand stitching it to the joining edge. It looks so ugly to me now, but hey, you live and learn, right?

I was working as a midwife full time in Butte, Montana when I made this quilt. I wanted it specifically to hang on a wall in my house because I had some other African memorabilia and I thought it would look great in my living room. So, in my haste to get it up to display, I didn't quilt it. I guess you could say I basted it, since I used some quilting thread to tie a small tacking stitch into about every other corner. I knew I didn't want to tie the quilt and have any yarn or string showing, but I didn't have the knowledge or skill set yet to machine or hand quilt.

Another big oopsie was using the store bought bias tape as a binding. Well, I suppose it would have worked alright if I had a walking foot on my sewing machine, but I didn't. I didn't even use pins. I hadn't pressed any of my seams, and was still using a 1/2" seam allowance, so the whole quilt to me has a slightly "wonky" appearance. The bias tape wasn't 100% cotton either, and had too much stretch to it. You can see how it rippled on the underneath side as I stitched it together. Some might say, "What a shame! You should go back and fix it with the new quilting techniques you've learned." And that's a valid point. I'm never going to find this fabric again. But for now I am just letting you see my first few quilts, and hopefully you learn from some of my mistakes and regrets and don't make them yourself. I might go back and pick out this binding one day and do a different quilting method, but for now, I'm looking forward to making the next projects with fewer mistakes.

Here it is hanging on the wall in my apartment in Butte. Do you like the bright green armchair I found at the thrift store? I put another one of my African prints on the back of the chair because it was missing a button. Ah, good times. Single days, living on a budget, catching babies. This quilt will always remind me of Ghana and Montana.


Gradient in Pixels Quilt


GRADIENT IN PIXELS QUILT
72" x 108"
Designed and made by Jamie
2004

This is the second quilt I ever made. Similar to my first, I was able to raid the fabric stash of a family member. My first quilt was made using my grandma's fabric. This quilt was made using my mom's fabric. I took a bunch of prints and a few solids, all with a country theme and cut as many 6-inch squares as I could. I used the same method of planning my quilt top as I did with my first, which was arranging the squares on the carpet at the bottom of the landing at my parents' house and walked upstairs to view it from a distance. This time I wanted to vary the colors from dark to light in a random, pixelated pattern to create a gradient. Gradients can be monochromatic, or one color, fading from dark to light. They can also be multiple colors. In this quilt, the gradient transitions from dark to light, starting with blues, browns, and reds and transitioning to yellows and whites. Here is a sample of some of the prints closer up.


Once again, I hand tied the quilt. This time I thought it would look better to have the ties blend with the quilt, so I used different colored embroidery floss for each row of the quilt. The embroidery floss followed the gradient from dark to light, as you can see in the next several photos.


I was really proud of the artistry of this quilt and how it turned out. There are still some little changes I would make if I were to redo it. One good thing I improved on from my first quilt was that I purchased fabric for the backing and pieced my backing rather than using an old sheet. However, I still bound the quilt using the method I had intuitively used on my first quilt. I layered the quilt together with the quilt top and backing facing each other, right sides touching, and the batting on top. I sewed around the perimeter, leaving a space, and turned the entire thing right side out, closing up the remaining few inches by hand. Not only is this harder, but it doesn't look quite as good as the quilts that are quilted/tied first and then bound. I learned my lesson by my fourth and fifth quilts when I took a quilt piecing class at my local quilt shop. (More on that later!)

So anyway, as you can see, the binding has a seam running around the perimeter of the quilt, and there were a few puckers along the way because of my method. One other mistake I noticed was that I sewed so close to the edge of my backing fabric, there are areas where the selvage, or finished non-fraying edge of the fabric showed through. See the white strip close to the seam? That's where the printed area of the fabric hadn't begun yet.

This quilt has held up nicely, and I still love it, even though there are a few imperfections here and there. I designed it to be extra long because I'm 5'11" and I wanted a blanket I could lounge on the couch with and it would tuck under my feet and still be able to pull up to my chin.

 My son, Mikey, was helping during the photo shoot. As a side note, you may notice some varying colors in these different photos of the same quilt. My photography skills are somewhat lacking, and I'm using my eight-year-old digital camera for all of these pictures. The gallery pictures of the quilts were a bit skewed from perspective, and I tried to correct them and square them back up in Photoshop, but they look a little crooked too. Forgive the inconsistencies as I try to improve my photography and editing. :)

Finally, I labeled this quilt with some embroidery, which is a good thing because I would have forgotten when I made it. Those are my initials for my maiden name: Jamie Beth Glenn. And if you are very clever, you may have figured out that Liz Glenn is my sister-in-law. She married my younger brother Duncan. And she rocks.


Wednesday, July 30, 2014

The Grandma Sue Quilt


THE GRANDMA SUE QUILT
74" x 74"
Designed and made by Jamie
1997

The first quilt I ever made came about as a suggestion from this lovely woman, Sue Stimpson. She is my maternal grandmother and I have so many fond memories of creating projects with her, from sewing to art to baking. She is a skilled oil painter too, and I think the artistic genes run in this side of the family.


This is my mother, Shawn Glenn, and me. Family resemblance, much? My mom is also crafty and artsy; she ran an impressive country wood craft pattern business from our home for about 15 years, and was the first person to sit down at a sewing machine with me and show me the ropes. I am so grateful she did!


So, back to my first quilt. On one of my many yearly summer visit to Grandma and Grandpa Stimpson's house in Wapato, WA, my grandma took me aside and told me I could make a quilt if I wanted to, with any of the fabric I could find in her sewing room. I jumped on it! As closely as I can guess, I was about 14 years old. I found a stack of fabrics I liked, pulled them out into another room and began cutting. It was so long ago, I don't even remember how I cut them. Were rotary cutters standard back then? Beats me. The fabrics I had chosen were remnants of varying sizes, so I got a different number of squares from each fabric. With a stack of assorted squares in my suitcase, I returned home to good ol' American Canyon, CA, counted up all my squares and began composing the pattern.

The squares I had the most of formed the border as well as a grid running vertically and horizontally through the center. The rest were arranged inside that grid until I was happy with the pattern. I laid them out on the carpet in my house at the bottom of the landing of our staircase, and would walk upstairs to see it from a distance. I made a lot of trips up and down those stairs during that project! If I remember correctly, I took all the rows and stacked the squares on top of each other from left to right, and carried them to the sewing machine to be sewn into rows. I then had 18 rows of 18 squares which I joined together, from top to bottom.


I had no idea about the quilting industry, the rich history of quilters and quilting, or any time-saving tricks. In fact, at this point in my teenage life, I didn't even know about machine or hand quilting. The only method of quilting I had done was tying, so that's what I used for this quilt. I also didn't know about techniques for binding my quilt. I did things a little backward on my first few attempts, relying solely on my own sewing knowledge up to that point. After piecing the top, I added some strips of my backing around the outside as a border. Next, I cut my batting to the same size, and put my backing material (an old sheet!) on top of the quilt top, right sides together. I sewed the three layers together, which wasn't easy as the batting kept getting caught on the presser foot, leaving an opening on the final edge, and then turned it inside out, like a pillow cover. I trimmed the excess batting in the seam allowance to help turn the corners, and closed the opening with some hand stitching. The border was finished off by stitching in the ditch all the way around the quilt where the border meets the pieced quilt top. And THEN, as the last step, I tied the quilt with some white yarn.

The whole idea behind this blog is to show my evolution as a quilter, so these first few quilts are a look back at my beginnings. I want to not only highlight the work I've done, but the things I would have done differently, or mistakes I made. Hopefully my trial and error can help others avoid some pitfalls as they are learning to quilt.
 Here is my overall assessment of this quilt, now looking back on it:

  • PROS: 
    • I liked the fabrics I chose, from what I had to work with in my grandma's sewing room.
    • The color story works well with cool shades of blues, pinks, and greens
    • The corners matched up quite well for my first patchwork attempt
    • It served its purpose and the quilt top has held up perfectly over the past 17 years
  • CONS:
    • There are a few fabrics I included that have a different sheen to them (see previous two pictures) and that is a bit of an eyesore to me now
    • I used a 1/2" seam allowance throughout. It was overkill and shrunk the overall dimensions of the quilt significantly compared with a 1/4" seam allowance
    • I didn't know whether these were all 100% cotton, or cotton blends, and I think some of the differences in thread count/texture/stretch could have accounted for some mismatched corners in my quilt top
    • Using an old sheet as a backing for my quilt was a bad move. I also don't know what type of thread I was sewing with, but I would venture to guess it was polyester thread, since that is mostly what my mom had on hand when I started sewing
      • The backing has since ripped because it started off being a bit threadbare
      • What started as a small tear in the backing became a gaping hole


The thread was stronger than my backing material, which tore directly along the seam line after a lot of use and several washings. Several of my yarn ties also tore free from the backing material with time and wear. If I were to make this quilt again, I would definitely use a good quality quilting cotton material for the backing, and would have done the binding differently.


All in all, a good first attempt to put in the books!